How do I stake NIL?
Stake your NIL with Atomic Wallet to earn passive rewards! In this article, we’ll walk you through everything you need to know to stake NIL and start earning.
Contents
- NIL 101: the things you need to know before staking your coins
- How to stake NIL in Atomic Wallet
- NIL staking rewards
- How to unstake your NIL
Getting started with staking
Staking is one of the more popular ways to earn passive crypto income. Instead of keeping NIL idle in your wallet, you’re contributing to the decentralization and security of the Nillion Network—and earning rewards for doing so.
When you stake NIL, you’re delegating it to a validator of your choice. Validators help maintain the network by confirming transactions and adding new blocks. In return, they receive rewards, which are shared with you as the delegator.
NIL 101: the things you need to know
First reward
~1–2 days
Regular rewards
Every day
Yearly yield
Varies by validator (~10–20%)
- You’ll have to pay a network fee every time you want to stake, claim, or unstake NIL. Make sure to leave some small NIL amount (that is, at least 0.012 NIL) on your available balance, so that you can pay the fees. Otherwise, you won’t be able to either claim or unstake your coins. For more details about the network fees, see our guide.
- Your NIL deposit will be frozen throughout the staking period. NIL will be delegated to a staking pool, which means that these coins won’t be counted towards your total balance. Also, you won’t be able to transfer or swap them.
- Lockup period: 21 days. Once you click or tap the Unstake button, your deposit will be frozen for 21 more days. After the unstaking period is over, your coins will be deposited to your address. NIL won’t be earning any interest over the waiting period.
- The minimum staking amount on Nillion is 1 NIL.
- Delegating to multiple validators will create separate staking entries. You will have to unstake/claim rewards from each validator individually.
How to stake NIL in your Atomic Wallet app
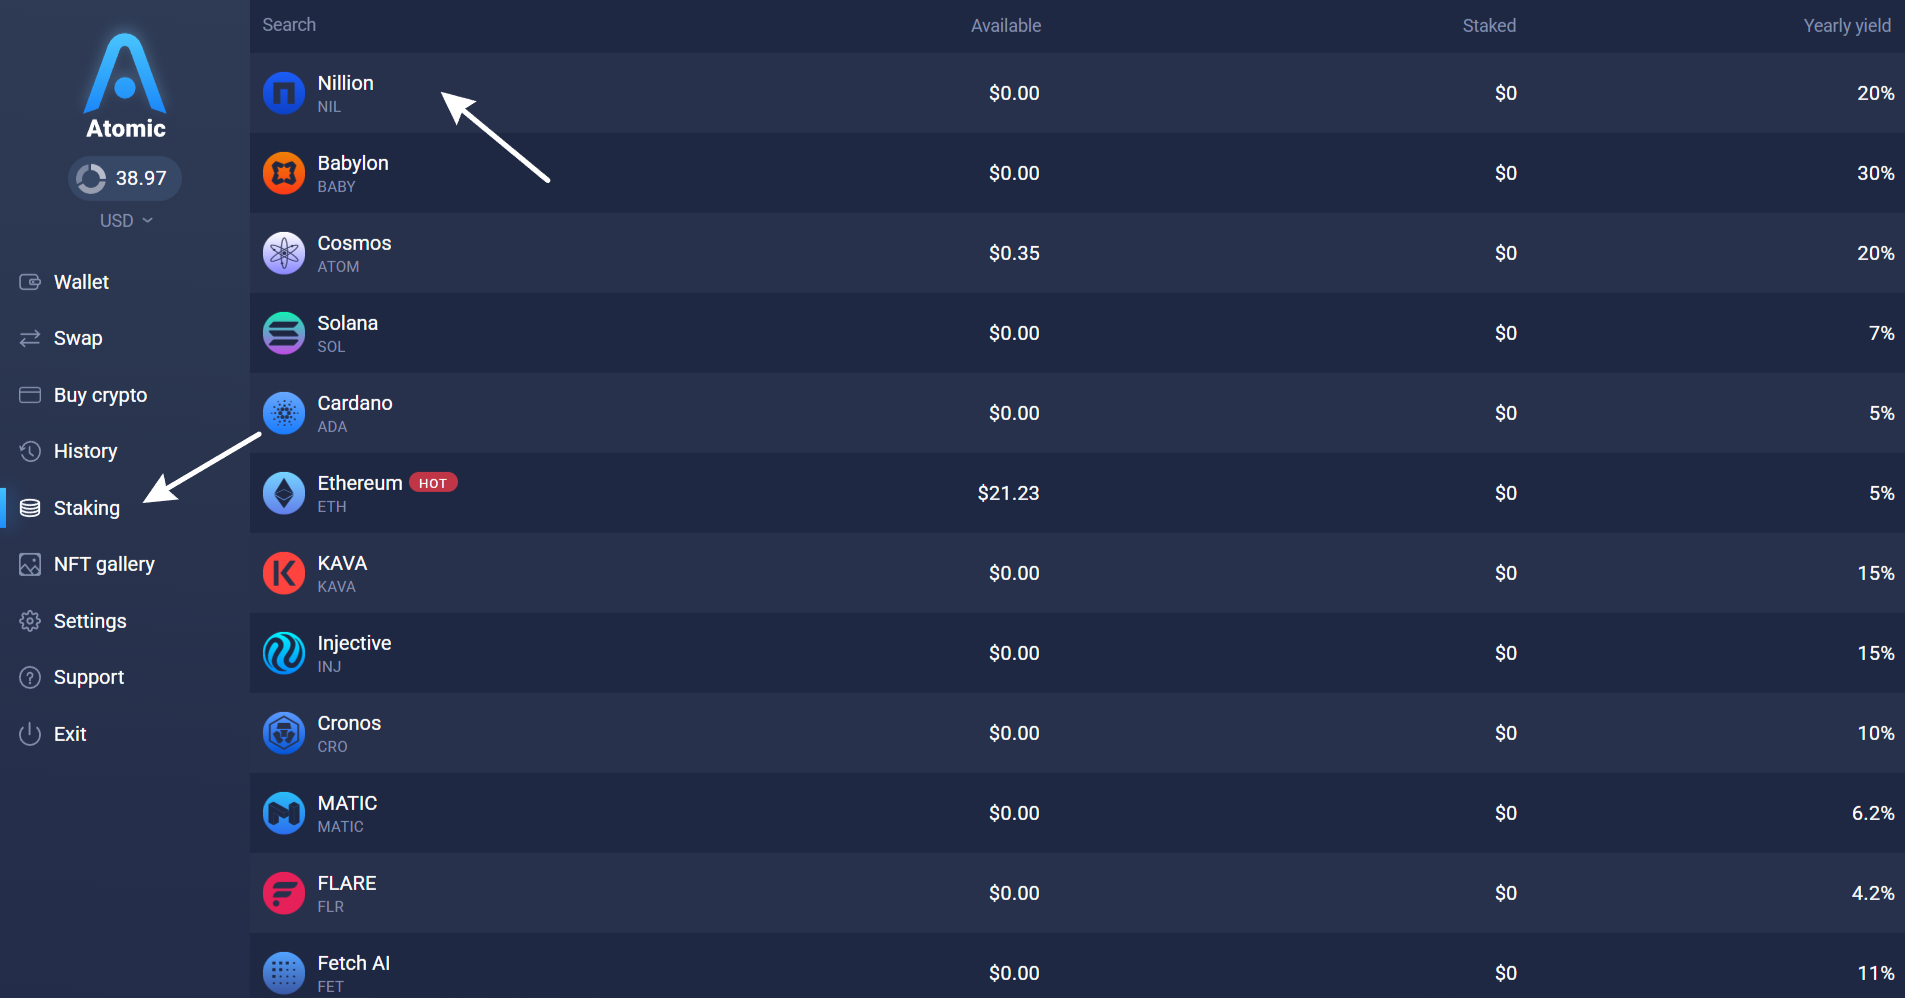
- Click Staking on the left sidebar;
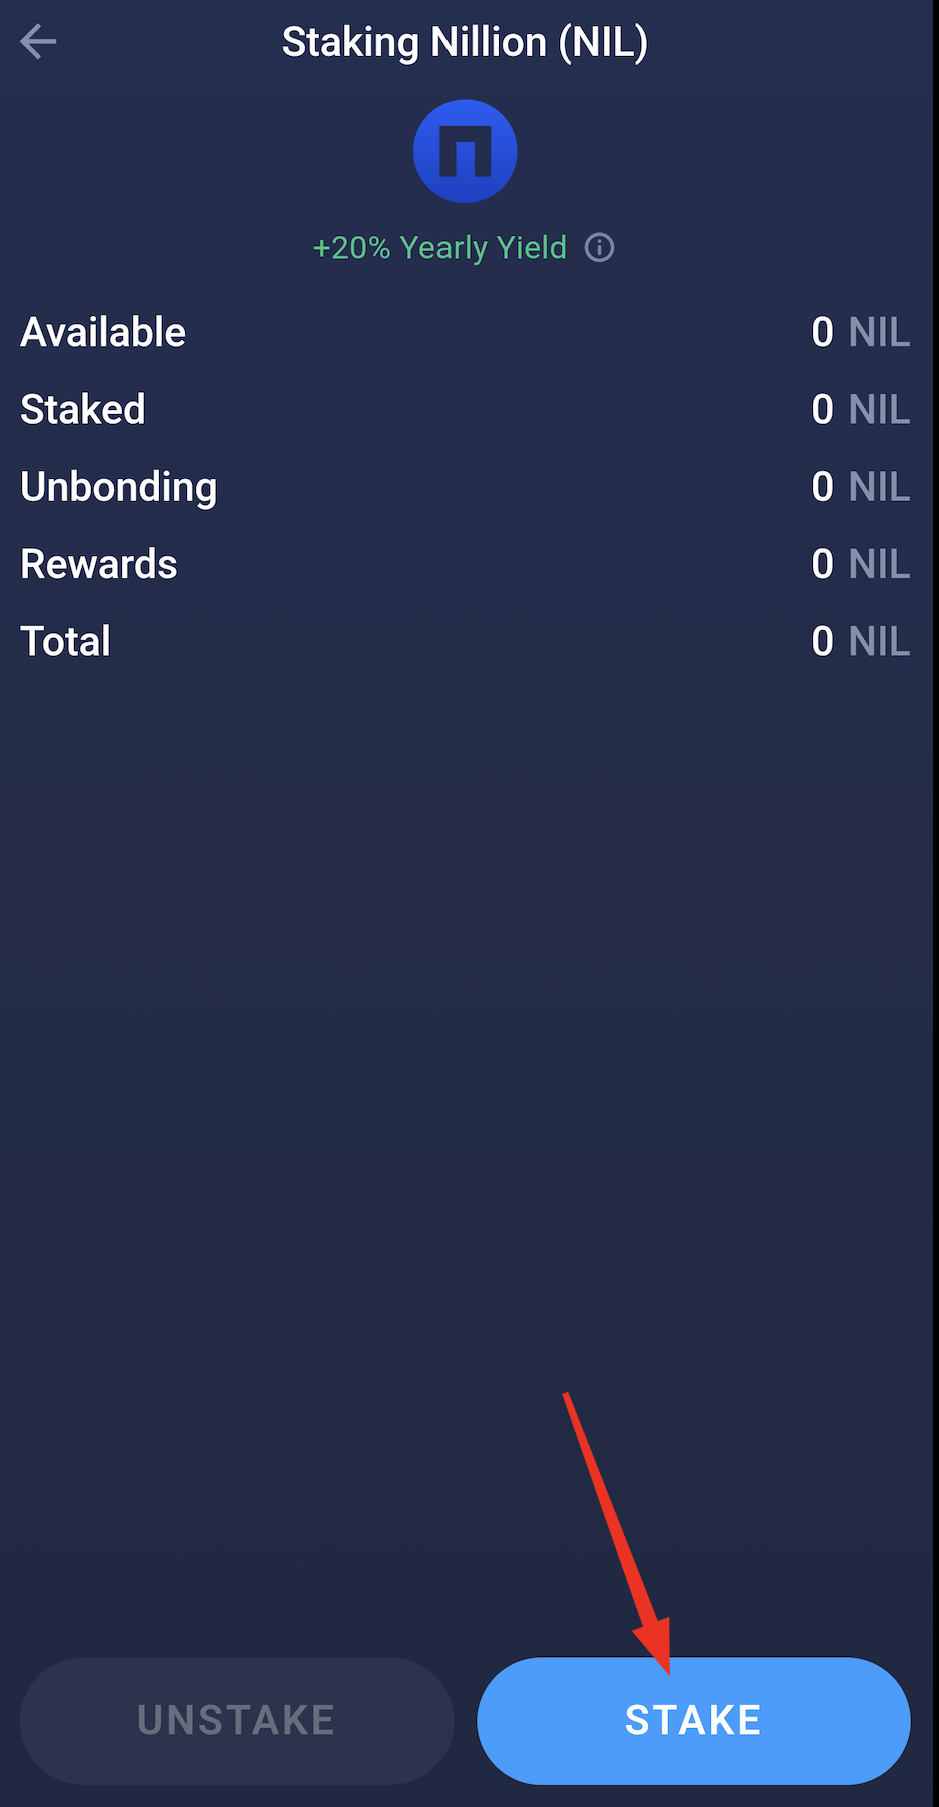
- Select NIL;
- Click "Stake";
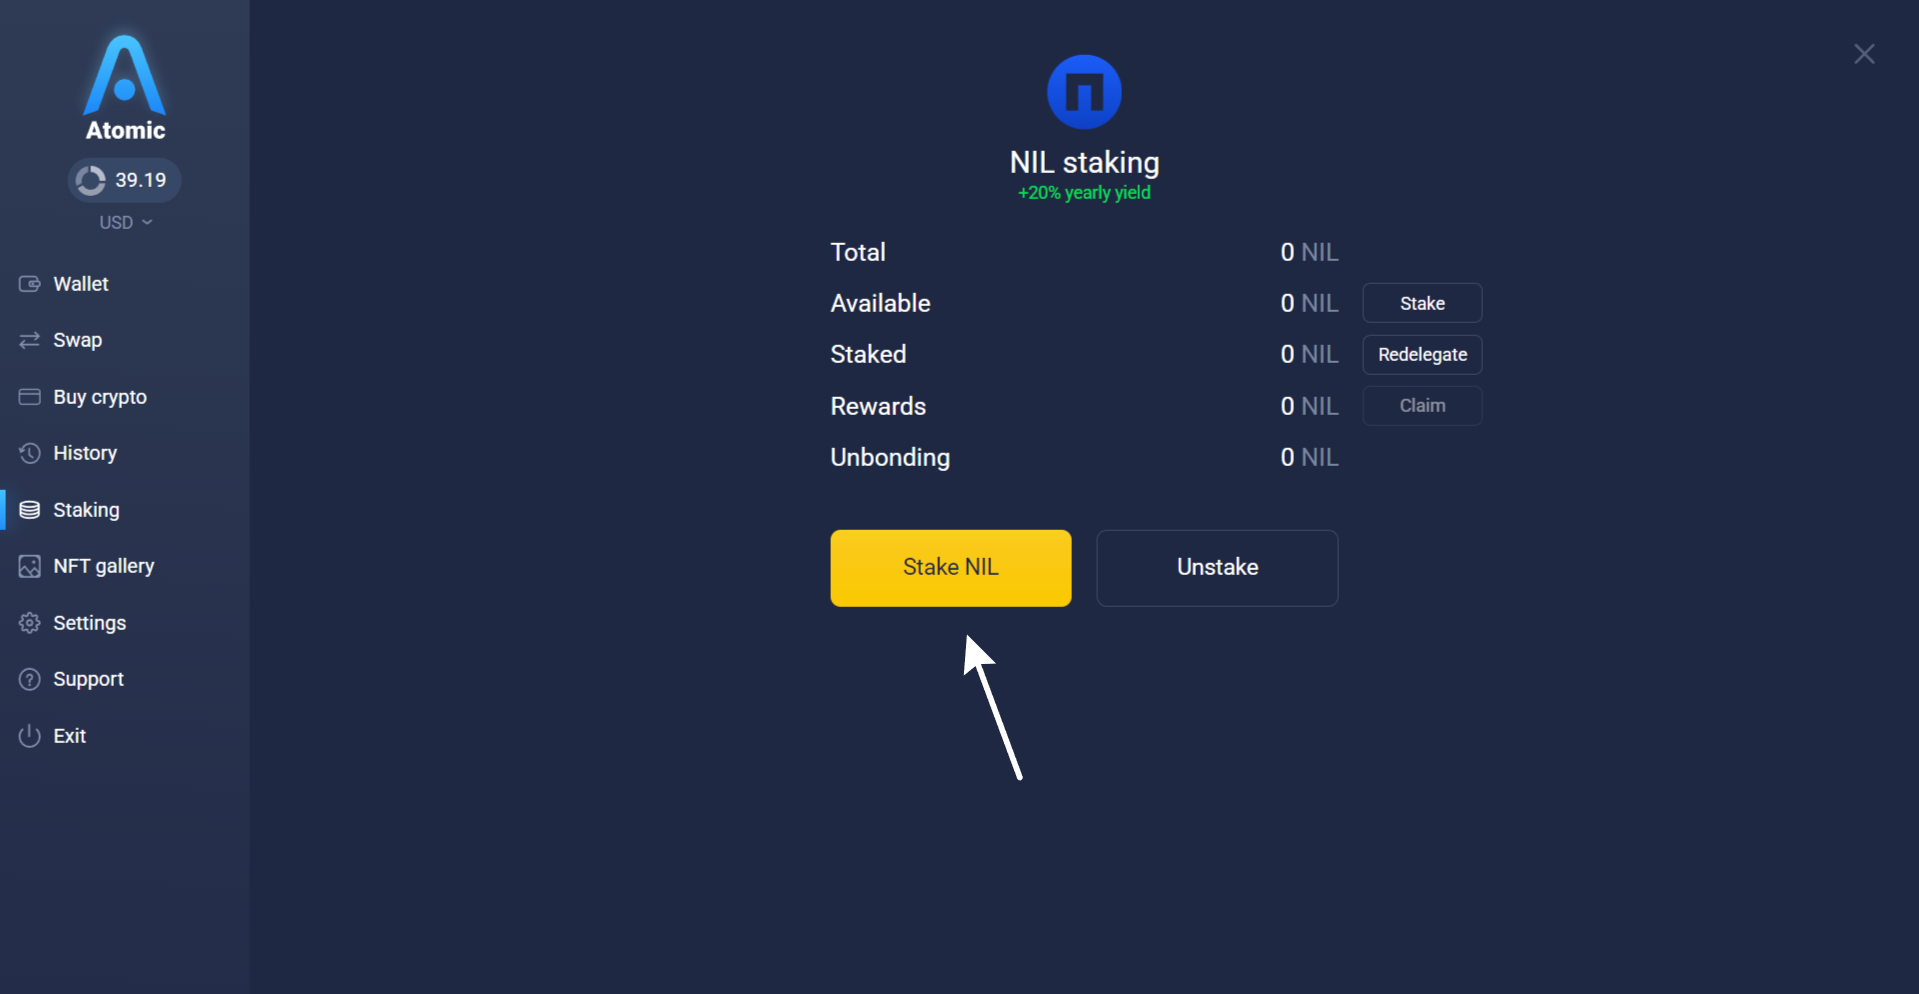
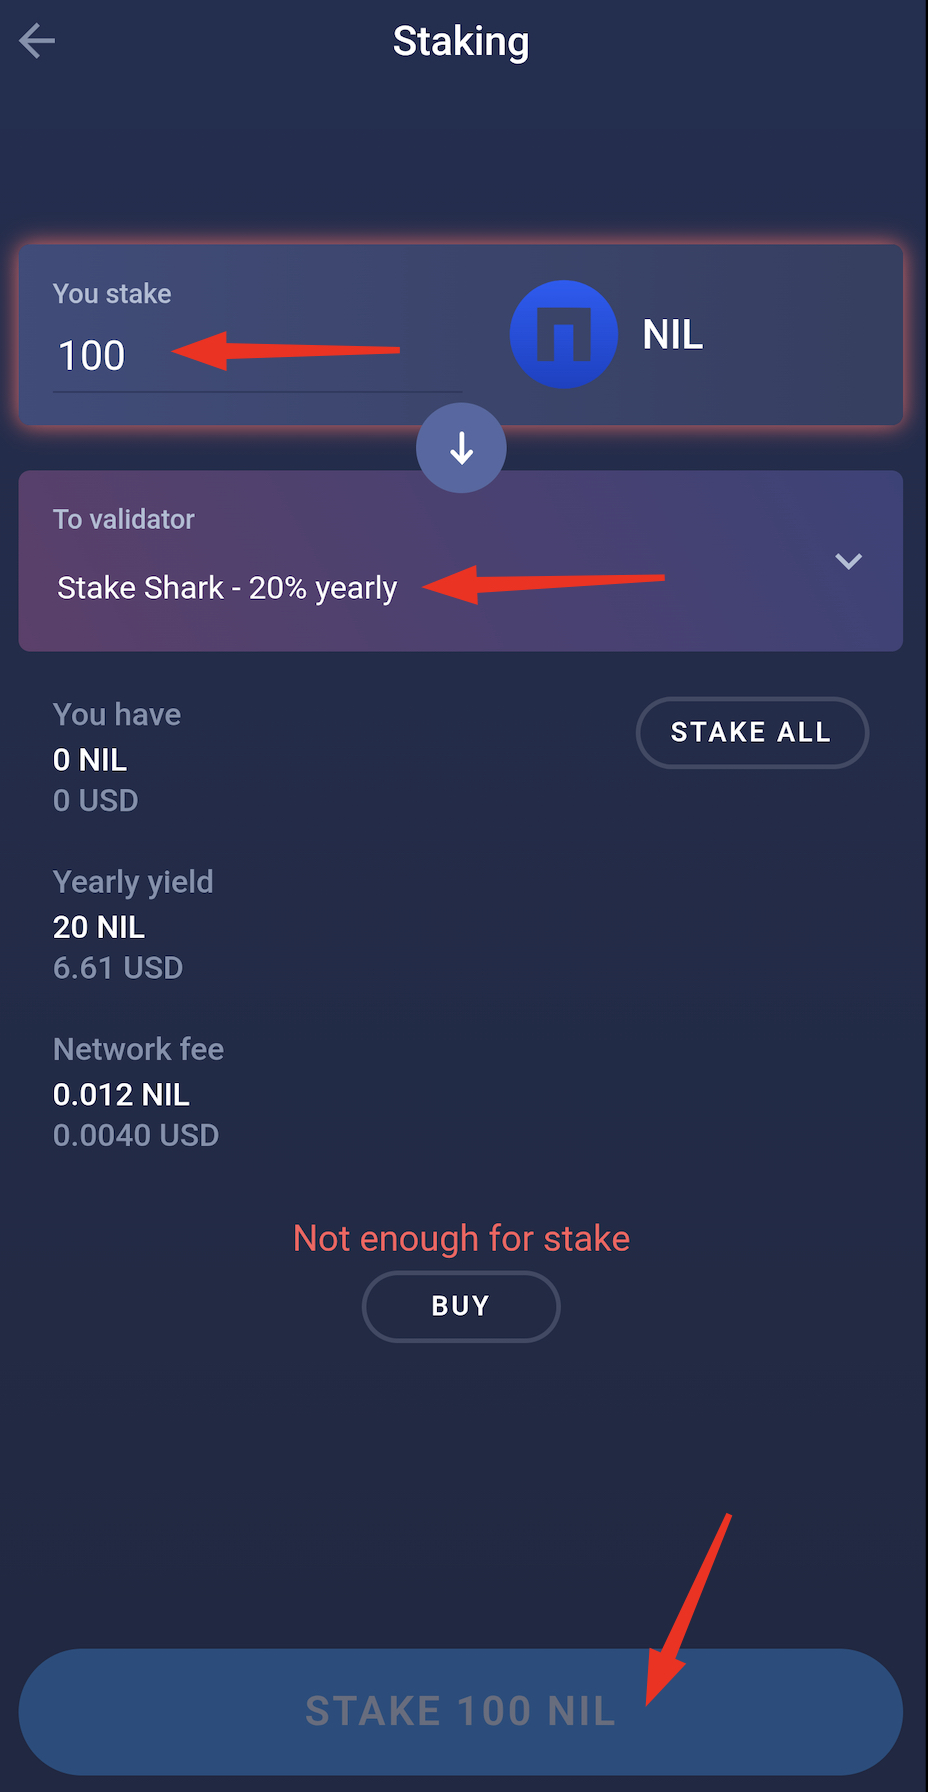
- Enter the amount of NIL you want to stake (minimum 1 NIL).
Note: You need to leave a small amount of NIL on your available balance to pay for network fees. - Browse through the list of available validators. You can go with the default option or pick the one you want to trust your NIL with. Once you make the decision, review the staking details and click the Stake button.
Before proceeding, please note that there's no way to cancel the staking transaction, and unstaking takes 21 full days in case of NIL. That's the way the blockchain itself operates, which means we won't be able to speed up the process for you.

- Enter your password and confirm.


Once the transaction is confirmed, NIL will be delegated and start earning rewards. You can check the hash of your staking transaction on the block explorer. You can monitor the staking status and validator info in the staking section of Atomic Wallet.
- Select: Staking tab in the bottom panel;
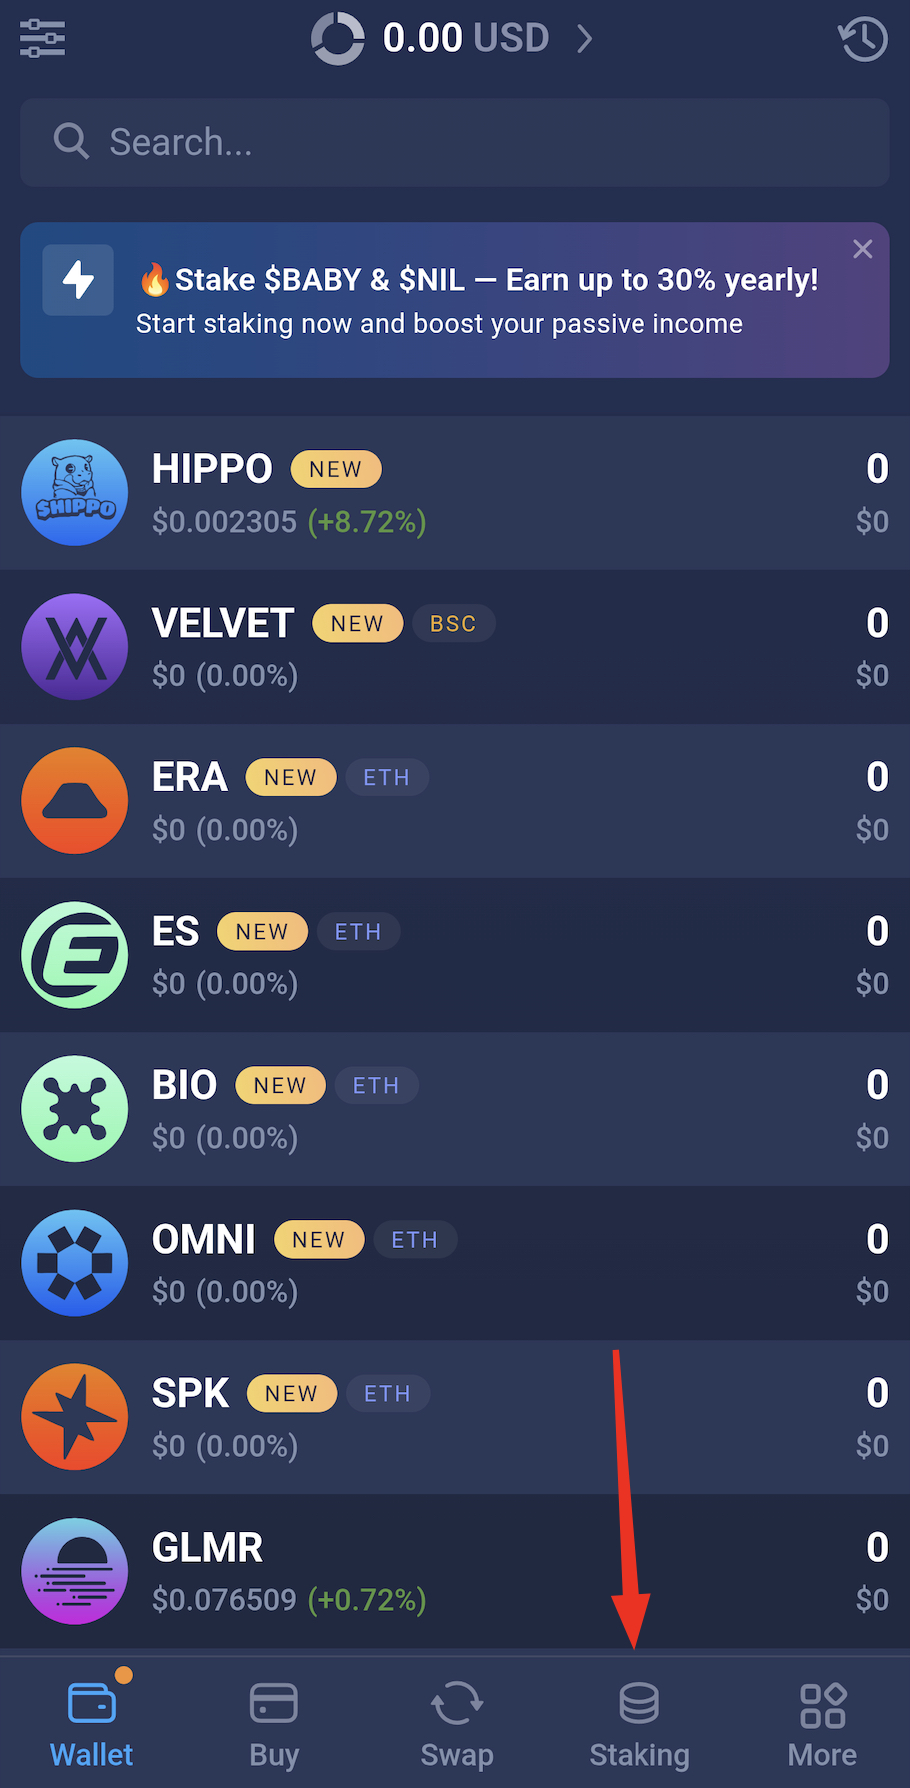
-
Tap and select or type: NIL;
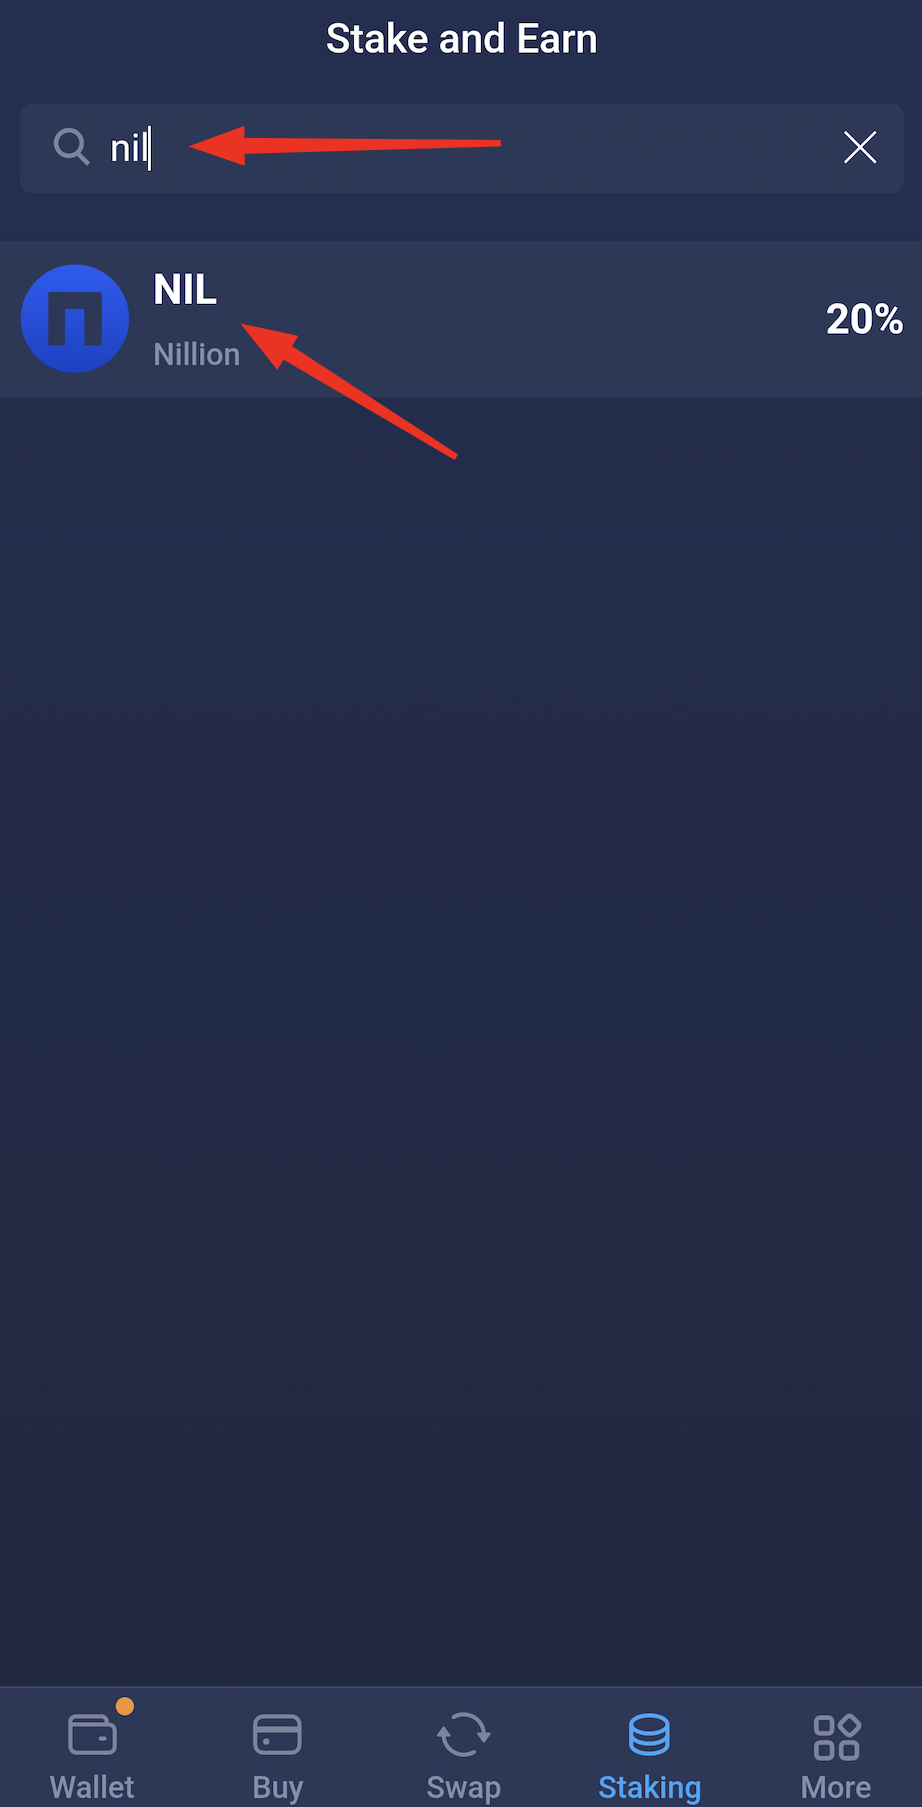
- Tap Stake;
- Enter the amount of NIL you want to stake (minimum 1 NIL);
Note: You need to leave a small amount of NIL on your available balance to pay for network fees.
- Once you're all set, tap Stake;
- Enter your password and confirm the transaction;
- That's it, your NIL deposit is now staked!


Staking rewards
Rewards will start showing up within 1–2 days after you stake and continue to accumulate daily. These rewards are not distributed automatically to Atomic Wallet. This will only happen after the staking rewards have been claimed by triggering a payout. You can claim NIL at any time, just click the Claim button. The Claim button will be disabled until there are rewards available to be claimed. Rewards won’t expire, they will be accumulating on the staking screen.
Note: Since claiming is a regular transaction on the blockchain, the Cosmos blockchain will charge you a network fee for it every time. The fee is taken from the available balance, not the staking deposit.
Each delegated stake earns its rewards independently. NIL needs to be claimed separately in this case.
Unstaking
You cannot transfer NIL directly to another wallet while it is still staked. You must first undelegate your assets for them to become liquid again.
It is important to note that you must wait for 24 hours after the initiation of the staking process. You must first account for this period before initiating the unstaking process. Also, 1 NIL must always remain staked. Plan accordingly when choosing the amount to unstake.
How to unstake your NIL
- Open the NIL staking screen.
- Click Unstake.
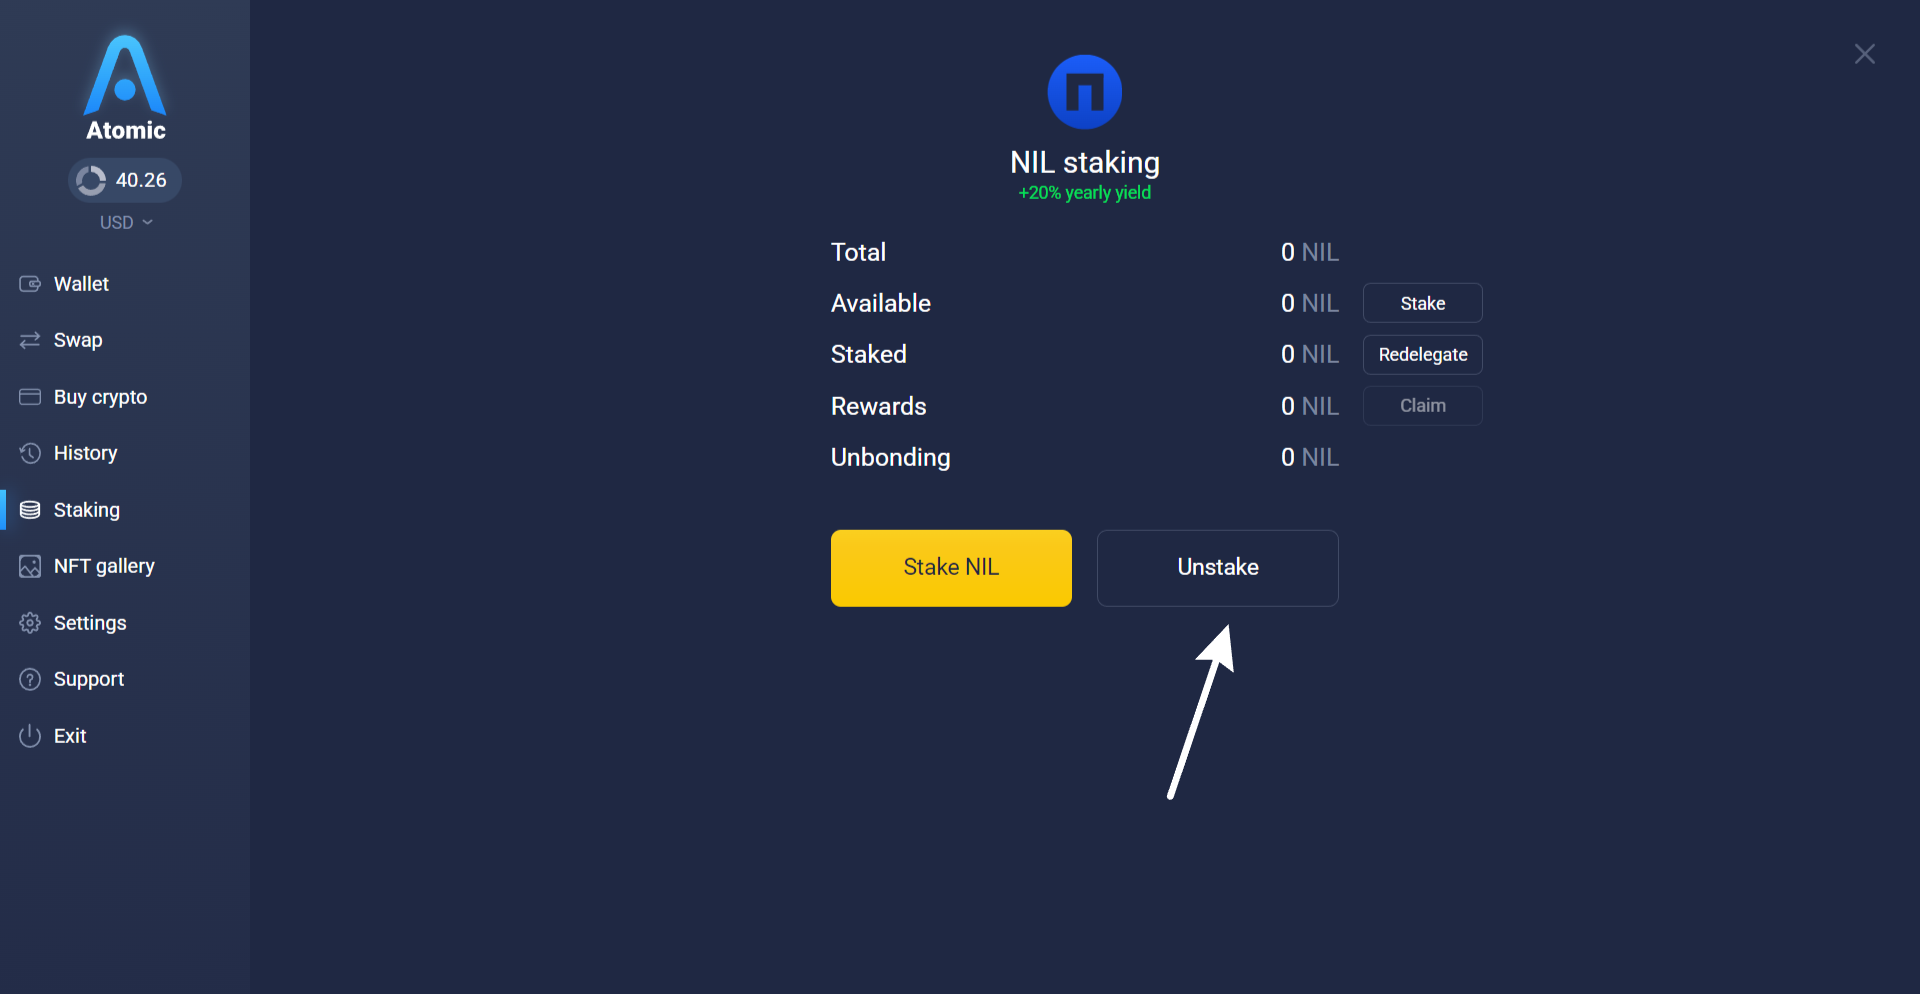
- Enter the amount and confirm.

Once confirmed, your NIL will stop earning interest and appear under Pending withdrawal.
It will become available to withdraw after approximately 21 days, as defined by the Nil blockchain protocol.
When will my NIL be available for withdrawal?
After you click Unstake, the transaction is submitted to the NIL blockchain. A countdown of ~21 days begins—during this time, your NIL is locked and not earning rewards.
You can track the progress in your wallet’s staking tab. Once the unbonding period is over, the tokens will appear under Available withdrawal.
Click Withdraw to return them to your balance. Don’t forget: this final step also requires a network fee.
Still have questions?
Reach out to us at support@atomicwallet.io—we’re happy to help!