How to add an EVM-like network in Atomic Wallet
In this article, you will learn how to add any EVM-like networks to Atomic Wallet. You can add any EVM-like network you like and you can add as many as you need.
To add an EVM-like network to your wallet, select your platform and follow the steps below. We'll use Harmony as an example, but the process is the same for all networks.
Note: Please note that the option to add any EVM network is a relatively new feature in Atomic, so you may encounter some visual issues. If you do, please contact our support team at support@atomicwallet.io for detailed instructions.
- Open the wallet and tap the 'Plus' icon in the upper right corner;

- Switch to the 'Coin' tab;

- Fill in the required information:
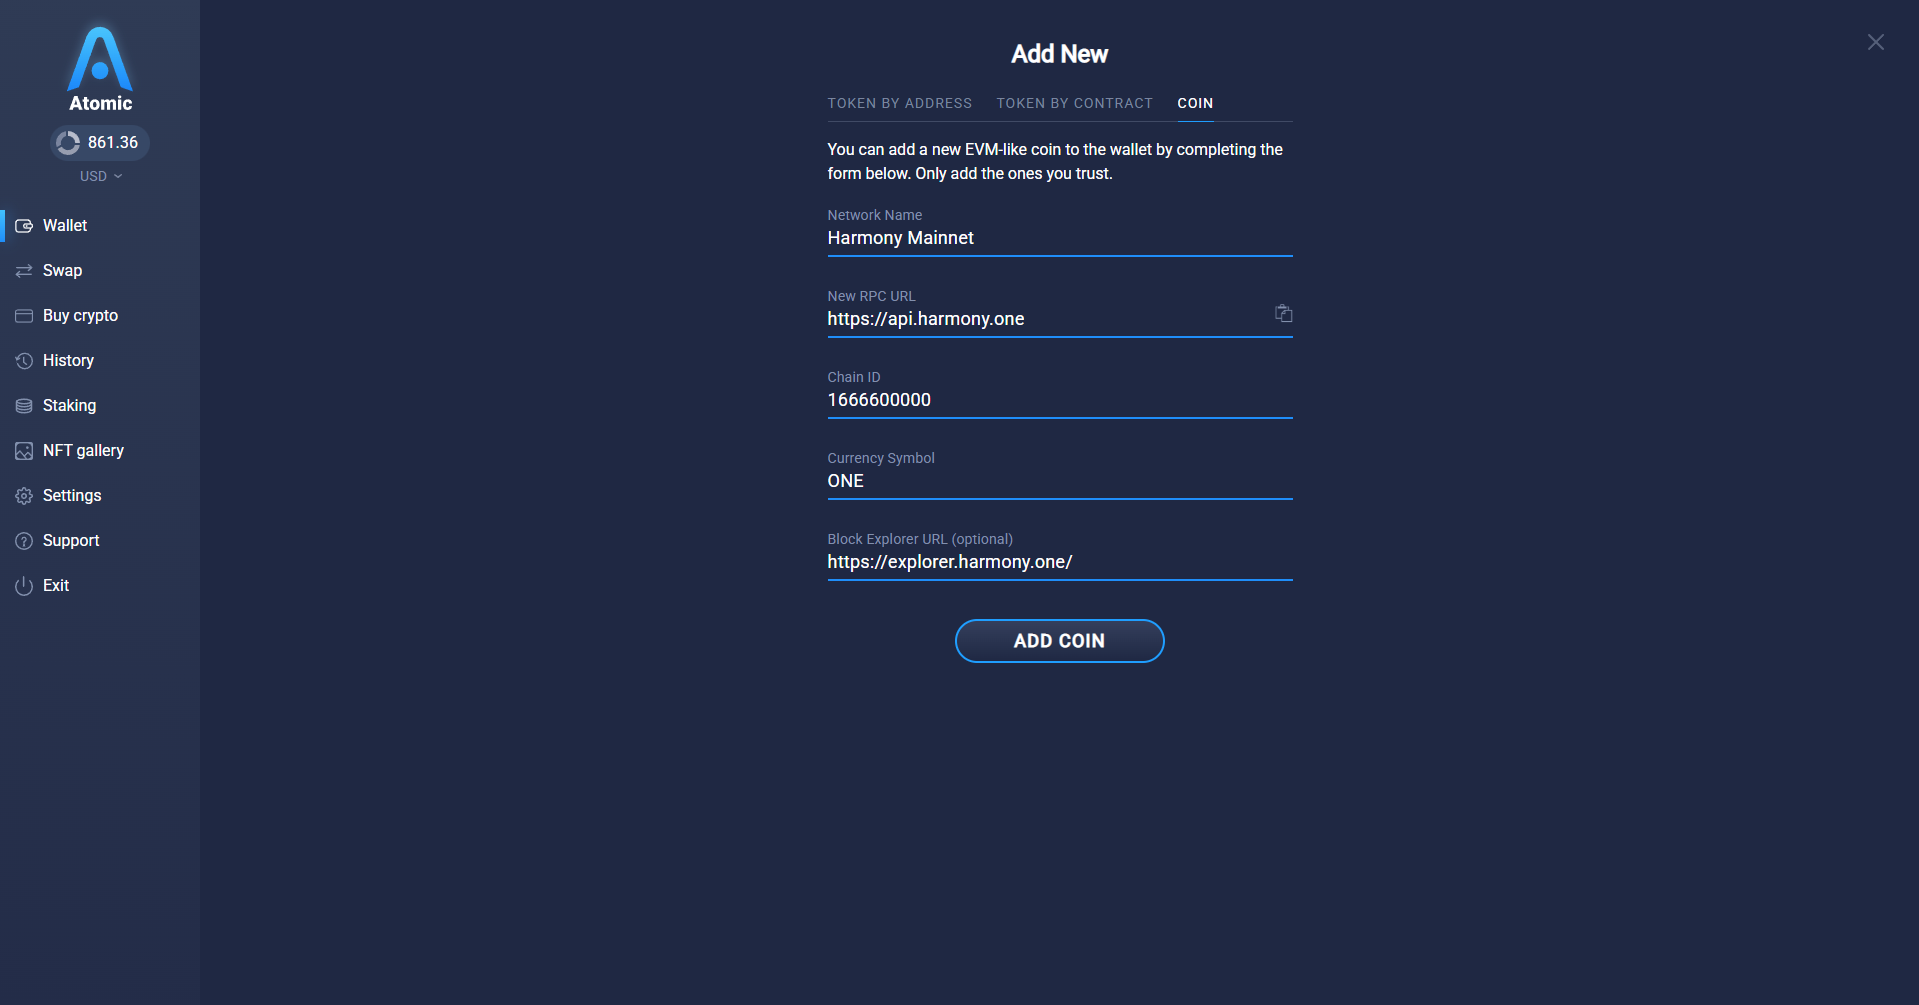
- Network Name - the name that will be used by the wallet to refer to the added network;
- New RPC URL - a URL address that your wallet will use to access the network;
- Chain ID - this chain ID will be used by the wallet to sign the transactions;
- Currency Symbol - the symbol that the wallet will use to display the native currency of the added network;
- Block Explorer URL (optional) - the block explorer that you will be directed to when inspecting the status of your transaction;
- Enter your password:

- If successful, you will see the following screen:That's it! You can now send, receive, and store the coin on the network you've just added.

- That's it! You can now send, receive, and store the coin on the network you've just added.


Note: if you don't have the required information available, the best course of action would be to look it up online. Usually, the developers of the network have official documents available online that list all the required information you might need. Alternatively, check out ChainList which has all the required information you need.


- Open the wallet and tap 'More' in the bottom right corner;

- Select the 'Add token or coin' option;

- Switch to the 'Coin' tab;

- Fill in the required information:

- Network Name - the name that will be used by the wallet to refer to the added network;
- New RPC URL - a URL address that your wallet will use to access the network;
- Chain ID - this chain ID will be used by the wallet to sign the transactions;
- Currency Symbol - the symbol that the wallet will use to display the native currency of the added network;
- Block Explorer URL (optional) - the block explorer that you will be directed to when inspecting the status of your transaction;
- After the information's been filled in, tap 'Add coin';

- If successful, you will see the following screen:

- That's it! You can now send, receive, and store the coin on the network you've just added.


Note: if you don't have the required information available, the best course of action would be to look it up online. Usually, the developers of the network have official documents available online that list all the required information you might need. Alternatively, check out ChainList which has all the required information you need.


